
IT’S FINALLY HERE – SPRING! The air is fresh and clean, birds fill the air with song, spring flowers start to make their appearance, and with water temperatures consistently above 40 degrees for a week or more we can start our ponds up for another enjoyable season. Below you will find 10 easy-to-follow steps to lead you
through the cleaning and start up process of your pond.
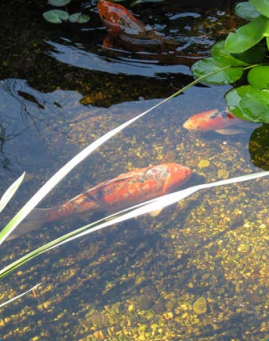
STEP 1: Clean Up the Surrounding Area
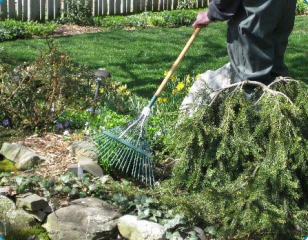
Rake up all the sticks and leaves from the surrounding area to prevent them from being blown into the pond once it has been cleaned. It is also time to remove the pond netting (if you used one to keep leaves out during the winter). (Photo 1)
STEP 2: Remove Debris from Pond
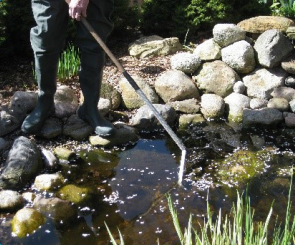
Use a skimmer net to remove any floating debris. For debris on the pond bottom, use a leaf net and/or a pond vac. Like the Matala Pond Vacuums sold by EasyPro®.String algae can also be plentiful. The amount of string algae found, once the ice melts, is in direct relationship to how much photosynthesis took place over the winter. Snow covered ice restricts the sun light penetration and the photosynthesis process, and string algae in the spring may be minimal. If there has been very little snow cover, string algae will be plentiful. (Photo 2)
STEP 3: Clean & Replace Water Plants
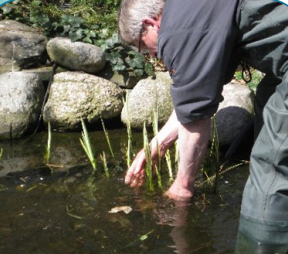
Retrieve from the deep the plants you wintered over, clean off any debris, cut back dead stems, being careful not to harm the crown of the plant, and set them in their proper places. Spring is an excellent time to divide and repot, with the exception of early blooming plants such as Iris’s. We don’t want to lose any of those beauties.
Starting in late April or early May, you may use slow release plant tabs to fertilize your plants. Water lilies may be divided once the water temperature reach the mid-60s. Any sooner and you run the risk of root rot. Be sure to keep the crown of the plant above the planting media. (Photo 3)
STEP 4: Do a Water Change (If Needed)
If your pond has minimal debris and sludge buildup, perform a 25% water change to refresh the water. With any debris and/or sludge buildup there will be elevated levels of toxins. So, a 25% water change is always a good way to refresh the pond water. Your fish will thank you! When adding new water, always add EasyPro® Water Conditioner to release chlorine and chloramines from city water, and to neutralize heavy metals from both city and well water.
If your pond has significant debris and sludge build up (1” or more) after the initial skimming, you can use a pond vacuum and perform a complete water change. Sludge build up is a symptom of a more serious problem. It is telling us that the pond can’t keep itself clean, meaning something is out of balance. It could mean the pond filtration is under sized, oxygen and/or beneficial bacteria remain low, the fish load has outgrown the filtration system, the plant cover or proper mix of plants is deficient, or the debris has been allowed to build up and decay over a long period of time.
Spring is a good time to identify and correct these issues. We can then enjoy the pond instead of spending time and money treating symptoms caused by an out of balance eco-system.
If you need to perform complete water change, first set up a temporary holding tank for your fish. Use water from the upper half of your pond so as not to disturb the toxic gases from the sludge found near the bottom. The holding tank should be set in a shady area, with an aerator or pump to maintain oxygen levels. The tank
should be covered to prevent the fish from jumping out or predators from sticking their noses in.
When returning your fish to the pond, the water temperature needs to be within 2 degrees of the temporary tank to prevent the fish from being stressed or going into shock. If the difference is greater than 2 degrees place the fish in plastic bags with water from the temporary tank and floated in the pond for 10 to 30 minutes prior to release. If the difference is 5 degrees or more replace 25% of the water in the bag with pond water every 10 minutes until the temperature is within 2 degrees prior to release. You can also use a tub.
If your pond water appears a tea color, brown or black, it may be due to tannin released from leaves or maple seeds left in the water. A 50% water change is the quickest solution. Tannin is a substance found in plants and when released in water, or rain water can soak leaves on a leaf net, and act as a tea bag dripping water and tannin into the pond creating a brown or black color. A heavy leaf load dragging the net into the water or even maple seeds in the spring can release tannin into the water. Note: Activated Carbon can also provide some assistance, however, a costly process.
STEP 5: Check the Filters & Reconnect the Pumps
If the filter pads or skimmer pads were not cleaned last fall, they should be cleaned prior to starting up the system. (Photo 1) Retrieve your bio-media bags from the bottom of the pond and place them
in the Aqua-Falls box.
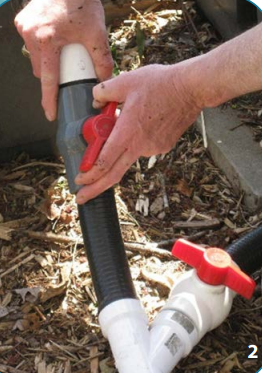
This is the best time to inspect and replace old worn out filter pads. Two great choices are the polyester pads or the long lasting Matala filter material. Reconnect tubing and adjust the ball valves that were opened prior to winter – then turn on the pumps and adjust to the desired flow rate with the ball valves. (Photo 2)
STEP 6: Test Your Water Quality
Pond water quality is extremely important and should be tested on a regular schedule using either a liquid reagent-style test kit or quick and easy test strips.
If ammonia and nitrite levels are higher than zero, an additional 25% water change
should be done until the levels are reduced.
If the pH is outside the 6.5 to 8.5 range, use either EasyPro® pH Up or pH Down according to directions to bring the pH back into a safe range. The pond water salinity (salt content) for fish should be between .1% to .25%. Starting from a salinity of 0%, add one pound of salt per hundred gallons of water and test with
a salinity meter.
STEP 7: Add Important Water Treatments
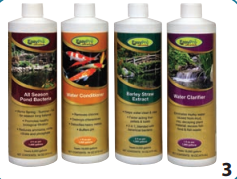
Getting your pond’s beneficial bacteria levels up early in the season means fewer challenges later. Use EasyPro® Seasonal Boost when water is 38 degrees or warmer. Then switch to EasyPro® All Season Liquid Pond Bacteria once the water temperature reaches 55 degrees or more. This is also a great time to add EasyPro® Barley Straw Extract to help keep your pond water clean and clear.
If the start up has left your pond a little cloudy from being stirred up, add EasyPro® Water Clarifier to clump suspended particles together making it easier for the filtration pads to quickly remove them. (Photo 3)
STEP 8: Ultraviolet (UV) Maintenance
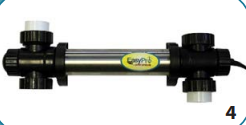
If you have one of the EasyPro® Ultraviolet Light Clarifiers to help control algae, thereby helping to prevent pea green water, the bulb needs to be replaced yearly and the quartz sleeve that protects the bulb needs to be cleaned. However, do not turn the UV unit on until the bacteria has had 48 hours to colonize on available surfaces within the pond. (Photo 4)
STEP 9: Prepare for the Return of Predators
Keeping your fish safe from predators can be a challenge. Here are a couple of solutions that could help keep protect them.
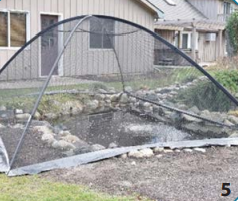
Fish are most exposed in early spring since plant cover has not yet developed. Especially at this time, fish are very visible to Blue Heron on the hunt. EasyPro® offers a few helpful options. The Leaf Netting, or Pond Tent, work very well and the Pond Tent can later be used in the garden. (Photo 5)
Since Blue Heron are territorial, you may find the EasyPro® 24” Bronze Resin Heron Fountain a strong deterrent. Providing a place for your fish to escape such as a Koi Castle, or fish tunnel are winning options as part of the pond design. A fish tunnel, with good flow through water design is preferable. (Photo 6) For an effective deterrent of raccoons and other mammals, EasyPro® offers a floating Gator Head. (Photo 7)

STEP 10: Begin Feeding Your Fish & Enjoy
You can begin feeding your fish when water temperatures remain at 50 plus degrees. With water temperature at 50 to 65 degrees you can feed your fish once a week. With temperatures 65 degree or higher your regular feeding schedule can be resumed.
For early spring and fall use EasyPro® Cold Water Food, which is high in wheatgerm. For the rest of the season, use either EasyPro® Max Color Food or Max Growth & Color Food. Both are fortified with spirulina and other marine ingredients for maximum color.