MWF36
Instructions for Operation • Safety • Warranty
Thank you for purchasing the Starburst Mini Pond Fountain. This fountain is powered by an asynchronous mag drive pump that is designed for continuous duty. Since the motor is oil-free, it’s safe for plants, fish, and wildlife. The fountain float contains six built-in super bright LED lights that provide a brilliant nighttime display. To use this product safely and to maximum benefit, be sure to read and follow these instructions. Keep a copy of the instructions for reference.
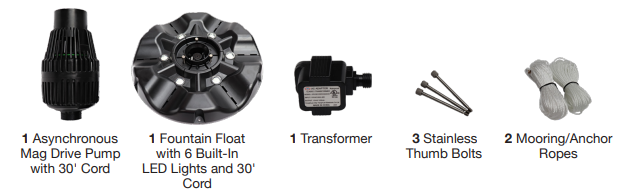
Box Contents
- 1 Asynchronous Mag Drive Pump with 30′ Cord
- 1 Fountain Float with 6 Built-In LED Lights and 30′ Cord
- 1 Transformer
- 3 Stainless Thumb Bolts
- 2 Mooring/Anchor Ropes
Safety & Electrical Connections
- Always disconnect the electrical supply before handling, maintaining, repairing, or installing any pond equipment.
- Keep out of the reach of children.
- Always make sure you know the correct amps and voltage required before installing.
- Use a dedicated power outlet only. Sharing the outlet with other equipment may cause overheating and fire.
- Always connect to a Ground Fault Circuit (GFCI) to prevent electrical shock. Never submerge connecting power cable plug in water.
- Never let the pump run without water as this will damage the impeller, overheat, and possibly burn out the pump. This pump must stay submerged entirely when operating. Running the pump low on water will cause overheating, premature failure, and will void the warranty.
- Do not use this product in bathrooms or swimming pools. For use with fresh water only.
- Do not use in water over 95°F (35°C).
- All electrical work must be performed by a qualified technician. Always follow the National Electrical Code (NEC) or the Canadian Electrical Code as well as all local, state, and provincial codes. Code questions should be directed to your local electrical inspector. Failure to follow electrical codes and OSHA safety standards may result in personal injury or equipment damage. Failure to follow manufacturer’s installation instructions may result in electrical shock, fire hazard, personal injury or death, damaged equipment, provide unsatisfactory performance and may void manufacturer’s warranty.
- Do not carry or lift the pump by the power cord.
- Never use an extension cord or tamper with the power cord. The power cord should not become bent, twisted, abraded, or cut. A damaged cable may cause electric leakage, shock, or fire. The power cord cannot be replaced, and the unit should be replaced if the cord becomes damaged.
- Do not remove the pump housing during operation of the pump.
Assembly, General Installation, Operation
- Slide the fountain float down over the top of the pump until it sits securely.
- Secure the float by inserting the three thumb bolts into every other hole. Finger-tighten the bolts until the tops of the bolts are flush with the inner rim of the float. Do not over-tighten.
- Connect the light’s power cord to the transformer.
- Connect the mooring/anchor ropes to the float.
- Place the fountain in your pond, in a location with a consistent depth of 18″ or more. Secure with the mooring/anchor rope.
- Plug the pump and light cords into a GFCI outlet. (See Safety and Electrical Connections for important instructions about power connections.)
- Set the timer for the fountain and lights if desired (purchase separately).
Service & Maintenance
Disconnect all power supplies before inspection or service to avoid possible electrical shock.
- Regularly inspect and clean the pump housing to ensure that it is clear of debris or algae which can reduce the flow.
- Be sure the pump housing is closed and properly latched to prevent debris from entering the pump.
- Check the water level daily to ensure the pump remains fully submerged.
- If the pump is left in water but not operating regularly, test run it at least once a week.
- Once per season, the unit should be cleaned of any debris build-up or mineral deposits on the impeller assembly and housing. Areas with hard water may require more frequent cleaning. To access the impeller:
- A. Remove the zip tie securing the bottom screen.
- B. Gently twist the bottom screen from the pump.
- C. Inspect the impeller and chamber.
- D. Clean using water and a damp cloth or sponge.
- A vinegar mixture may help remove hard deposits.
- If the impeller is damaged, replace it with a new impeller.
- Be sure the pump housing is closed and properly latched before returning to the pond. A zip tie is recommended to secure the unit.
- Cleaning the lenses on the lights will keep your nighttime display bright. Lights pop out and back into the float easily for cleaning, but they may be cleaned without removal.
- Winterization/Storage: When the pump is out of use for an extended time, wash and dry it, then store it indoors in a non-freezing location. It is essential to prevent any risk of the pump freezing.
EasyPro Pond Products Limited Warranty
EasyPro Pond Products (“EasyPro”) warrants to the purchaser that this product (“Product”) will be free from any mechanical or material defects for a period of one year from the date of purchase. Gaskets, impellers, and bulbs are considered wearable items and are not covered under this limited warranty.
This warranty only covers properly installed and maintained Products sold by authorized EasyPro Sellers who are subject to and follow EasyPro’s quality control standards. Please note that because EasyPro is unable to control the quality of Products sold by unauthorized sellers, unless otherwise prohibited by law, this warranty does not cover Products purchased from unauthorized sellers.
This warranty does not cover normal wear and tear, nor any deterioration suffered through overloading, improper use, negligence, improper installation, acts of God, or accident. Similarly, any modification made by the purchaser to the Product will cause the warranty to be null and void. This warranty does not cover any cost associated with the installation or removal of the Product subject to a warranty claim.
All returned items will be inspected to determine the cause of failure before a warranty claim is approved. The exclusive remedies provided hereunder shall, upon EasyPro’s inspection and option, be either repair or replacement of the Product or parts covered under this warranty.
Making a Claim:
A Return Authorization (RA) number must first be obtained by calling EasyPro at 800-448-3873 or via email at warranty@easypro.com. It is the purchaser’s responsibility to pay the return shipping charges. Be sure to include the RA number, original receipt, your name, return address, and phone number inside the package. No warranty claims will be honored without the original receipt that shows that your purchase was made from an Authorized EasyPro Seller. Ensure the product is properly packaged and insured for the replacement value.
Troubleshooting
Does not start
- Make sure power cord is plugged in.
- Check outlet GFCI or house circuit breaker.
- Improper power supply.
Pump is running, no/low spray
- Check pump housing or piping for obstructions.
- Check pump housing or impeller for clogs.
- Check if impeller is broken or stuck.
- Water level is too low with pump sucking air.
GFCI breaker tripping
- Power cord may be damaged and getting wet. The cord is not replaceable, so a new unit will be required.
- Nuisance trip due to improper grounding.
- Overloaded circuit.
Pump stops
- Ensure pump is clear of obstructions.
- Check that the impeller is in good condition. Replace if needed.
- Check power supply.