Assembly is cut to length and glued on-site, check valve installs outside skimmer.
*Picture displayed is for reference only, actual product or application may vary.
- All PVC fittings must be primed and glued.
- Properly tighten hose clamps on rubber coupler.
- Check valve must be installed with correct flow and vertical orientation

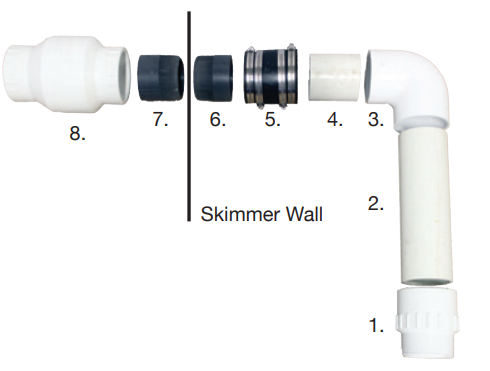
CVA30K
Compatible with – TB8000, TB12000,
TM9500, TM13500
1. 3″ Male Adapter
2. 10″ Long – 3″ PVC Pipe
3. 3″ Elbow
4. 3 3/4″ Long – 3″ PVC Pipe
5. 3″ Rubber Coupler
6. 3″ x 3″ Nipple
7. 3″ x 3″ Nipple
8. 3″ Check Valve
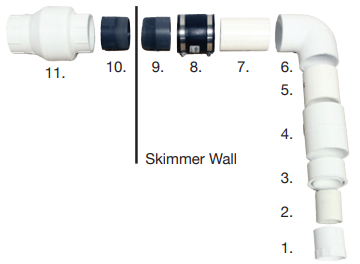
CVA30K9
Compatible with – EP9700
1. 2″ Female Adapter
2. 2″ Long – 2″ PVC Pipe
3. 2″ x 3″ Reducer Bushing
4. 3″ Coupler
5. 3″ Long – 3″ PVC Pipe
6. 3″ Elbow
7. 5″ Long – 3″ PVC Pipe
8. 3″ Rubber Coupler
9. 3″ x 3″ Nipple
10. 3″ x 3″ Nipple
11. 3″ Check Valve